Showing posts with label Dairy Free. Show all posts

Wednesday, March 13, 2013

Lemon Blueberry Poundcake

   I can't recall eating poundcake during my pre- gluten free days.  Although I do remember my mom telling a story of when my brother baked a poundcake... and that it was a heck of a lot heavier than one pound!

   But have no fear.  This recipe yields the most amazing and foolproof poundcake ever.  {And it weighs the appropriate weight!}  


   Regardless of whether I've eaten the gluten-filled version, I am so happy that I have discovered poundcake now.  This recipe is knock-your-socks-off amazing.  Light.  Fluffy.  Bursting with bright lemon and moist blueberry.  Especially perfect for spring.  


   It is perfect for brunch, dessert, {lunch... dinner... midnight snack...}, friends and family.  It's also perfect for those crazy dairy free people in your life. 

   So what are you waiting for?  Get baking!  It's an incredibly easy recipe to whip up!  


Lemon Blueberry Poundcake  adapted from Gluten Free Easily

ingredients
   2 1/2 cups gf flour (I use this flour ratio)
   1 ½ tsp xanthan gum
   1 ¼ tsp sea salt
   1 tsp baking powder
   ¾ cup olive oil
   1 c - 1 1/2 
cups sugar (depending on how sweet you like your cakes)
   2 Tbs orange juice or lemon juice
   2 Tbs lemon emulsion
   lemon zest (I zested one whole lemon)
   3 eggs
   2/3 cup full-fat coconut milk
   2 cups frozen or fresh blueberries

method
   1.   preheat oven to 350F
   2.   mix dry ingredients in medium bowl
   3.   in large bowl mix sugar, olive oil, lemon emulsion, orange or lemon juice, and zest
   4.   add eggs one by one into wet mixture then add milk and mix for 2 minutes.  add dry              ingredients and mix well.
   5.   fold in blueberries.
   6.  scrape batter into greased bundt pan, 2 bread loaf pans, or angel food cake pan (that's what I used).
   7.   bake for 50 - 60 minutes then cool fully and Enjoy!

Linking up at these Fabulous Parties: 
The Mandatory Mooch

Wednesday, January 23, 2013

"Oh. My. Yum. Vegan Meatballs"

There is a new adjective in Michelle's Thesaurus of a brain ... yup, that's right... the wheels were totally a-turnin' on this one: "Oh. My. Yum."

Seriously though, who literally says that out loud when they eat something so savory, so delicious, so so good?

I don't see any hands.  Well, I guess I'm crazy  {Did I hear you say you already thought that?!}.  Because I couldn't stop saying that phrase when I ate these (vegan) meatballs and soon enough you'll find yourself saying the same phrase.  They are that good.

By now my household is about 90% vegan.  No cheese.  No dairy.  No meat.  We only eat seafood once in a blue moon and organic eggs.  Honestly I feel great.  And am learning that it is SO true that your physique is 80% diet.  But that should be a post for another day.

Instead let's focus on how completely satisfying and mouth-wateringly scrumptious these meatballs are. And healthy.  Pair these with spaghetti squash and spinach tomato sauce and you will be in heaven.  

Dear "Real" Italian comfort food... move on over because you have some major competition here. 


"Oh. My. Yum. Vegan Meatballs"  adapted from the veggie nook

Ingredients
1 1/4 cup raw sunflower seeds
3/4 cup nutritional yeast
3/4 cup sundried tomatoes
2 cloves garlic
1 tsp oregano (I didn't measure, just shook a whole bunch in)
1 tsp fennel seeds (same, didn't measure)
red pepper flakes
dash sea salt
1-2 Tbsp water
Method
1.  Blend sunflower seeds in Blendtec or food processor until it resembles coarse flour
2.  Add all ingredients except for water.  Blend together.
3.  Add water to help ingredients stick together if needed.
4.  Roll into little balls and eat.  Or refrigerate for later snacking!


Linking up at these Fabulous Parties: Made It By Monday @ Baked in the South, Made from Scratch Monday @ Living with Food Allergies and Celiac Disease , Mangia Mondays @ Delightfully Dowling, Tuesday Talent Show @ Chef in Training, Crazy Sweet Tuesday @ Crazy for Crust, Gluten Free Wednesdays @ The Gluten-Free Homemaker, Allergy Free Wednesdays, Sweet Treats & Swanky Stuff @ Something Swanky, Anything Goes Linky @ Bacon Time with the Hungry Hypo, Sweets for A Saturday @ Sweet As Sugar Cookies

Wednesday, January 16, 2013

Cutesy Cupcake Cookies {GF, Dairy Free, Nut Free}

 It's pretty obvious I have already failed at my first New Years Resolution... *ahem* I should have posted last week... But that's ok.  Because... I have been oh so busy doing stuff.  {insert sarcasm}
And because I've been swamped with busy-ness (like a gazillion loads of laundry with my new fancy washing machine!) I've decided to share these gluten free, dairy free, nut free sugar cookies with you.
I made these cookies for my awesomesauce neighbor to bring in to her students.  And since 99% of kids have allergies these days, she asked that they be free of those three allergens.  
The verdict?  Totally kid approved.  Easy to roll out and shape with a cookie cutter.  And cute.  Super cute.  
Want to try the recipe?  I followed Adventures of a Gluten Free Mom's Sugar Cookie Recipe and simply made royal icing to decorate!  Easy Peesy.  And yummy wummy.

Thursday, October 4, 2012

Cashew Corn Chowder with Cilantro Cream

So as you know (or may not know) I love love love Pinterest.  Just like almost every other girl.  And just like almost every other girl, I pin mouth watering recipes... Like this recipe for Cashew Corn Chowder with Cilantro Cream.


Since my sweet hubby gave me a Blendtec a month ago (eeee I'm up to 50 uses on it already!!!), I have been itching to try this recipe.  I mean come on, creamy chowder made with cashews instead of cream?  A cream made with cashews instead of dairy?  I've been reading every where in blog land how soaked and blended cashews mimic dairy, but I had yet to try it.

Until... I discovered that Alta over at Tasty Eats at Home was hosting Adopt A Gluten Free Blogger - a  super fun party where GF bloggers "adopt" another GF blogger and recreate at least one of their recipes.

I chose Sarah from My New Roots who, of course, created the Cashew Corn Chowder.  Sarah's blog is wonderful.  It features fresh nutrient rich ingredients and drool worthy photographs.  She is also a holistic nutritionist so her recipes are chock-full of super foods that fuel your body and leave your taste buds begging for more.

This corn chowder was ridiculously easy to make and can easily be adapted to your taste preferences.  (Like... basil can easily substitute the cilantro, canned corn for fresh, etc).  It also freezes beautifully and reheats wonderfully.  

So what are you waiting for??  Check out Sarah's recipe for Cashew Corn Chowder and get cooking and blending!  :)

Linking up at these Fabulous Parties: Made It By Monday @ Baked in the South, Made from Scratch Monday @ Living with Food Allergies and Celiac Disease , Mangia Mondays @ Delightfully Dowling, Tuesday Talent Show @ Chef in Training, Crazy Sweet Tuesday @ Crazy for Crust, Gluten Free Wednesdays @ The Gluten-Free Homemaker, Allergy Free Wednesdays, Sweet Treats & Swanky Stuff @ Something Swanky, Anything Goes Linky @ Bacon Time with the Hungry Hypo, Sweets for A Saturday @ Sweet As Sugar Cookies

Monday, September 24, 2012

Healthy Mint Chocolate Mousse

I'm back I'm back I'm back!  Did you miss me?  I think I missed you... just a wee bit ;)


So here's what I've been up to/ MIA here on The GF Wife: 

*Marathon training: just ran 20.5 miles this past Saturday.  
I. Am. Beast.  (slow beast)
*Work.
*I volunteered to be the Ombudsman for USCG Air Station SF and there's lots of work needed to improve that program.  And soon I have to do formal training for it.  (Oh, and the Command took me out to lunch a couple weeks ago!)
*Beau is away for training.  So it's just myself, the pups, and crazy kitty for a month and a half.
*Beau also gave me a honey-to-do list.
*I finished watching seasons 7 & 8 of Grey's Anatomy.  Obviously more important than the honey-to-do list.
*AND Beau bought me a Blendtec!!!!!!!!!!!


Which leads me to one of my new favorite desserts that can be whipped up in no time.  Healthy Mint Chocolate Mousse Pie with a chocolate cookie crust!  

I shared this dessert with my friends the other week... and they loved it!  The crust didn't break when I cut it and it complemented the mousse oh so perfectly.  

And I bet you have no idea that its secret ingredient is... 
drum roll... 
tofu!  ;)

The Mint Chocolate Mousse recipe is lightly adapted from my favorite vegan dessert blogger Chocolate Covered Katie.  She's a genius.  Seriously.

Ingredients for cookie crust (adapted from Gluten Free Baking Classics):

1/4 cup brown rice flour
2 Tbs oat flour
1/4 cup cornstarch
3 Tbs tapioca flour
1/4 cup sugar
1/4 cup cocoa powder
1/2 tsp xanthan gum
dash sea salt
5 Tbs cold butter/ vegan butter
1 tsp vanilla extract

Ingredients for mint chocolate mousse:

1 package (12-14 oz) firm organic tofu
1/4 cup + 2 Tbs cocoa powder
4 Tbs coconut oil
1/4 cup agave
1 tsp vanilla
1/4 tsp peppermint
dash sea salt

Method:

1.  Place all ingredients for cookie crust (except for vanilla extract) into Blendtec or food processor and pulse until it looks like coarse cornmeal.
2.  Add extract and pulse until it starts to form a dough.
3.  Lightly oil a pie dish and press the dough into an even layer in pan.
4.  Bake at 350 F for 18 minutes.
5.  Let cool completely.
6.  When crust is completely cool, combine all ingredients for mousse to Blendtec and pulse until completely mixed together and smooth.
7.  Fill pie crust with mousse and place in fridge until firm!  (Or just eat it right then.  Or out of the Blendtec container.  Not like I do that or anything...)
8.  Enjoy your healthy guilt-free treat!!!!

Linking up at these Fabulous Parties: Made It By Monday @ Baked in the South, Made from Scratch Monday @ Living with Food Allergies and Celiac Disease , Mangia Mondays @ Delightfully Dowling, Tuesday Talent Show @ Chef in Training, Crazy Sweet Tuesday @ Crazy for Crust, Gluten Free Wednesdays @ The Gluten-Free Homemaker, Allergy Free Wednesdays, Sweet Treats & Swanky Stuff @ Something Swanky, Anything Goes Linky @ Bacon Time with the Hungry Hypo, Sweets for A Saturday @ Sweet As Sugar Cookies

Monday, August 13, 2012

Strawberry Rhubarb Crisp


  This past weekend Beau and I took a trip "down south" to Gilroy where we attended the Annual Garlic Festival!  We watched a cooking competition, ate garlic sweet potato fries, and tasted garlic ice cream... which was actually really good!
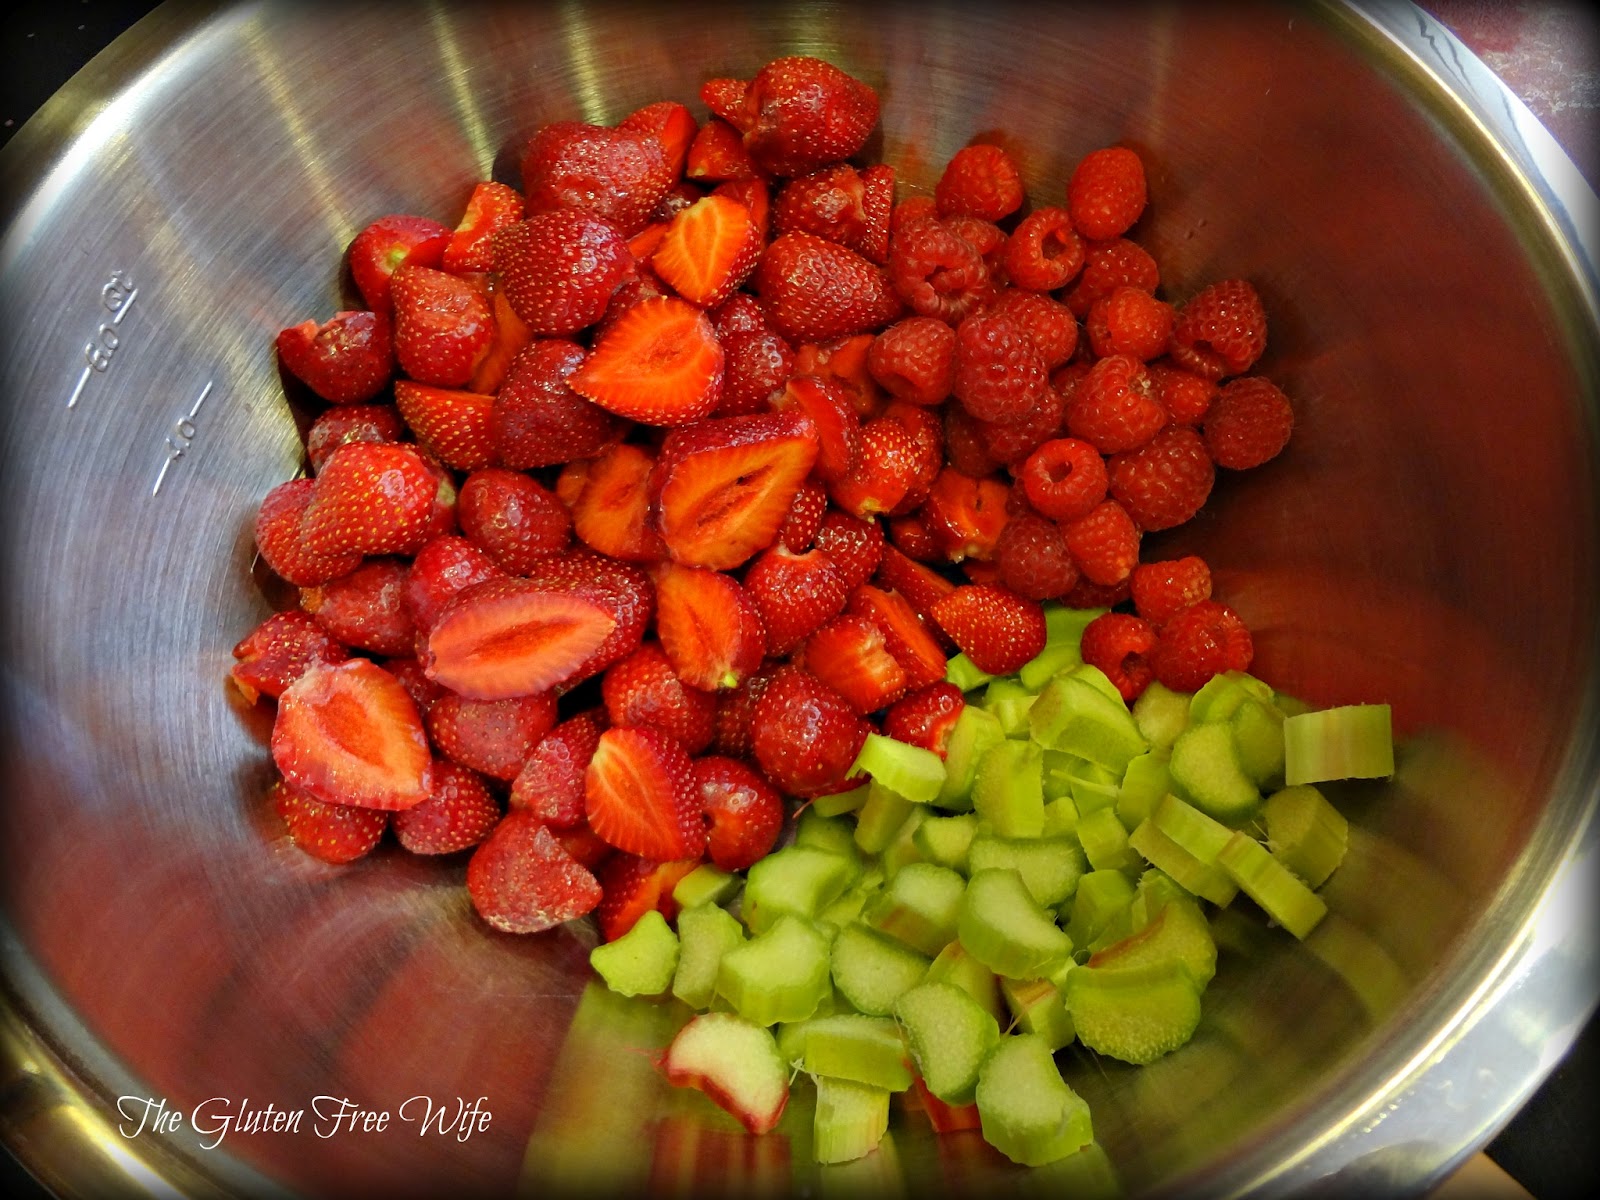
  After a few hours it got really crowded there so we decided to drive the long way home on scenic highway 1.  On our way home we stopped at a local strawberry farm and picked strawberries!  There were so red and juicy and sweet mmm.  We also found a local farm stand and came home with this bounty of freshness:


  But one thing's for sure- when you pick fresh strawberries they don't last too long.  So I needed to come up with a quick and easy way to enjoy them.  Crisps and cobblers are one of my absolute favorite desserts so I decided why not make a fresh strawberry rhubarb crisp!

Fruit crisps are one of the easiest and quickest ways to prepare a dessert.  They're perfect for serving guests as well as settling your sweet tooth without all the guilt.  I make my crisps with next to nothing sugar.  Most recipes out there call for 1 cup plus of sugar just to coat the fruit.  Fruit is already loaded with sugar so why add more?  It tastes so much better without the added sugar.  Trust me.


Ingredients (for fruit mixture)

2 pounds strawberries, washed, leaves removed, sliced
2-4 stalks green rhubarb sliced to 1 inch thickeness (I only had 2 but I wish I had more for some tartness!)
raspberries (optional)
2 Tbsp sugar
1 Tbsp cornstarch


Ingredients (for crisp topping) (I actually halved this recipe because I didn't have enough ingredients on hand!  Feel free to make as little or as much as you'd like!)

2 cups gf flour mix (1 cup rice flour, 2/3 potato starch, 1/3 tapioca flour)
1/2 cup brown sugar (or less!)
1 tsp cinnamon
1/2 tsp nutmeg
1 tsp xanthan gum
2/3 cup cold dairy free butter substitute such as Earth Balance (or regular butter) cut into chunks


Method:
1.  Place sliced fruit in large bowl and mix in sugar and cornstarch until fruit seems coated.  Place into 9x 13 in glass baking dish.
2.  Measure out your flours, spices, and xanthan gum and mix in bowl.
3.  Add your butter of choice and using a pasty tool or fork, mix butter and flour until it resembles coarse corn meal.
4.  Sprinkle topping onto fruit.
5.  Bake for about 45 minutes.  Serve warm or cool, top with homemade ice cream, and Enjoy!


Or serve for friends over for dinner!  Our neighbors loved it!  :)


Linking up at these Fabulous Parties:
 Made It By Monday @ Baked in the SouthMade from Scratch Monday @ Living with Food Allergies and Celiac Disease Mangia Mondays @ Delightfully Dowling, Tuesday Time Out @ Reasons to Skip the Housework Tuesday Talent Show @ Chef in TrainingCrazy Sweet Tuesday @ Crazy for Crust, Gluten Free Wednesdays @ The Gluten-Free HomemakerAllergy Free WednesdaysSweet Treats & Swanky Stuff @ Something SwankyAnything Goes Linky @ Bacon Time with the Hungry Hypo 

Thursday, August 9, 2012

Homemade Tortilla Chips


I love me some salt.  And with all this running, I have to make extra efforts to put more salt in my food so I stay hydrated and you won't find me face down on some trail.  Hmm, bad visual there... sorry Mom  and Dad... anyways...

Enter one of my favorite snacks: Tortilla Chips!
A few weeks ago the hubby came back from grocery shopping at Costco and he bought a HUGE pack of white corn tortillas.  I rolled my eyes and said something along the lines of why did you buy that many tortillas?  You know 99% of corn is GMO.  What the heck am I going to make with all of those?  {FYI I always get grumpy when he grocery shops.  That's my job haha}


And so they went into the freezer.
Until I got over my GMO issue and realized our salsa has been lonely in the fridge.  And we've been out of store bought tortilla chips for a week and a half.  What a disgrace!
pre-cooked and ready to go into the oven!
So I decided to make chips with some of those soft tortillas.  
The verdict?  Pretty darn tasty!  And ridiculously easy.  Go make some.  I know you have 100+ tortillas hiding in your freezer.
crispy, crunchy, and ready to be eaten!
Ingredients:
corn tortillas (white, yellow, large, small)
olive oil
sea salt
(paprika, cumin cracked pepper, lime juice - optional)
Method:
1.  Preheat oven to 350 F  
2.  Brush both sides of tortillas with olive oil (or use a misto).  Make sure tortilla doesn't get too soggy.
3.  Sprinkle with sea salt and any other flavorings you'd like.  Get creative!
4.  Cut in 6 or 8 pieces and place on parchment lined baking sheets.
5.  Bake for 8 minutes, rotate baking sheets, and bake for another 8 minutes.
6.  Let cool and enjoy!
Linking up at these Fabulous Parties:
 Made It By Monday @ Baked in the SouthMade from Scratch Monday @ Living with Food Allergies and Celiac Disease Mangia Mondays @ Delightfully Dowling, Tuesday Time Out @ Reasons to Skip the Housework Tuesday Talent Show @ Chef in TrainingCrazy Sweet Tuesday @ Crazy for Crust, Gluten Free Wednesdays @ The Gluten-Free HomemakerAllergy Free WednesdaysSweet Treats & Swanky Stuff @ Something SwankyAnything Goes Linky @ Bacon Time with the Hungry Hypo 
The Mandatory Mooch

Wednesday, July 25, 2012

Roasted Rosemary Potato Bites

  Looking for an easy dinner side dish?  Or for breakfast?  Brunch?


 Look no further!


  These Roasted Rosemary Potato Bites are sooo yummy and easy to make.  Take five minutes to prepare them, then pop them in the oven for 45 minutes!  They're perfect alone or dipped in ketchup {mmmm ketchup how I love thee}


Ingredients
5-10 organic red potatoes chopped into bite size chunks (I chop enough to fill a 13x9 baking dish)
extra virgin olive oil
rosemary (fresh or dried)
thyme (fresh or dried)
sea salt
pepper
hot pepper flakes (optional)


Method
1.  Preheat oven to 425 F
2.  Place potato bites in 13x9 glass baking dish.  (Potatoes seem to stick less to glass dishes)
3.  Drizzle generously with EVOO and season generously with rosemary and thyme.  Sea salt and pepper to taste!
4.  Give a good stir to make sure potatoes are covered in yummy goodness and place in oven.
5.  Bake for about 40 minutes, stirring every 10 min so that potatoes don't stick too much to dish.
6.  Once they seem done, broil for a few minutes to get them nice and crispy!  Enjoy!  


I'm partying at these blog parties!

AllergyFreeWednesdays

Ladybird Ln

Friday, July 20, 2012

Vietnamese Braised Eggplant

So I think our little purple friend always gets the raw end of the deal.  Most people cringe when they hear the word eggplant.  Hey, I used to.


Somehow my taste buds have changed over the years {hallelujah!} and now I buy this purple vegetable almost every single week.  And let me tell you, when it's cooked correctly, it is out. of. this. world.  


Let me introduce you to a new recipe that is inspired by Vietnamese flavors, but has some major twists on it created by yours truly.  This dish is entirely gluten free and vegan but packs some major flavor punch!  Feel free to adjust the spiciness to your liking.  This recipe is just hot enough that you get a slight tingle on your lips.  Oh... and the eggplant... I guarantee this will be the most smooth, silky, soft, and flavourful eggplant you will ever taste.  {Yep... and leftovers are great too!  Just ate some for lunch while drooling over this recipe again...} 


Vietnamese Braised Eggplant adapted from Girl Cooks World

Ingredients
1 large eggplant, peeled & cut into large chunks
1 tsp salt
1 tsp sugar
2 tbsp olive oil
1 onion quartered & separated
1/2 tsp caraway seeds, crushed to release flavor
5 garlic cloves minced
1/2 tsp - 1 tsp cayenne pepper
1/2 tsp black pepper
1/2 red bell pepper, chopped
1 can chickpeas, rinsed
3/4 cup light coconut milk (or full fat)
1/4 cup Liquid Aminos (or gluten free soy sauce)
basil & red pepper flakes to garnish


Method
1.  Place eggplant chunks in colander and sprinkle with salt.  Let sit for 20 minutes.
2.  Rinse eggplant, pat dry, then sprinkle with sugar and place in bowl.
3.  In a large skillet, heat olive oil at medium heat.  Then add eggplant and occasionally stir for about 5 minutes.
4.  Add onion, caraway, and garlic and cook for 5 minutes.  Stirring occasionally to make sure eggplant and garlic don't stick to pan.
5.  Add pepper, chickpeas, cayenne pepper, black pepper... give a good stir... then add coconut milk and liquid aminos (or soy sauce) and let simmer for about 15 minutes.
6.  Serve eggplant mixture over quinoa or rice.  Garnish with fresh or dried basil and hot pepper flakes and enjoy!


parting at these scrumptious blog hops!

Living with Food Allergies and Celiac Disease "Made from Scratch Mondays"


Ladybird Ln

Thursday, June 21, 2012

Cannelli Bean Salad with Artichokes and Walnuts

  I have decided that every Thursday is going to be dedicated to sharing easy and healthy snacks, meals, and everything in between {like dessert!}.

  The reason you ask?

  I'd like to help my awesome coolio Dad learn how to cook.  He makes tasty scrambled eggs, and wraps, and... well, that's about it!  So here is my attempt, across the country, to teach him how to cook and prepare meals for him and my Mom.

  Enter: Cannelli Bean Salad.


  This bean salad literally took me 5 minutes to prepare this afternoon.  With all my marathon training (and Blogilates workouts feel the buuurrrn!) I needed something to tide me over before dinner.

  This appetizer/ snack/ side dish is super easy to make and so flavorful.  It's great for hot summer days or days when you just don't feel like cooking.  Just under 5 minutes of prep and you have a high protein dish with a dash of healthy fats and vegetables.


Ingredients
1  can cannelli beans aka white kidney beans (you could sub chickpeas as well)
1/2 red pepper diced (or any kind of bell pepper)
3/4 cup walnuts
1/2 can artichoke hearts cut-up
1 Tbs lemon or lime juice
2 Tbs olive oil
handful fresh basil and/ or cilantro
salt and pepper to taste

Method
  Rinse and drain beans.  Chop your red pepper and artichokes and transfer to bowl.  Add beans, lemon or lime juice, olive oil, walnuts, and herbs.  Season with salt and pepper to your liking!

  Now wasn't that easy?!  This bean salad is so fresh and colorful and packed with all good stuff for your body.  Go make some and keep it always on hand.  Such a great alternative to other snacks out there!

  Good luck on your first "cooking" challenge, Dad!     ;)


Sunday, June 17, 2012

Chocolatey Rocky Road Make-Over

   Everyone loves ice cream.  Especially me.  When I received a good report card in school, my parents didn't give me cash.  Or new clothes.  Oh no.  I got to make a huge ice cream sundae!  Which, in my opinion, is soo much better than money  ;)


  As the years have gone by, I've been realizing more and more that ice cream, err, the dairy, does not settle well with me.  So I've been slowly giving my favorite ice cream flavors a make-over!  I used full-fat coconut milk to replace the dairy and it makes this treat oh so creamy and rich, but it doesn't taste coconutty at all.  Actually you know what?  I think it's even better than the dairy ice cream version! 
  
  This Rocky Road Ice Cream is dairy free, gluten free {obviously!}, refined sugar free, and vegan if you desire to omit the mini marshmallows.


Ingredients:
1 can full-fat coconut milk (14oz)
1/3 cup agave (you can get away with less if you like less sweet treats)
1/3 cup cocoa powder
2 tsp vanilla extract
1/4 cup chopped almonds
handful or two of mini marshmallows (optional)

Method:
  Combine all ingredients except for nuts and marshmallows and churn in ice cream maker according to directions.  The last 5 minutes before it's "done" add nuts and marshmallows!  You can either enjoy ice cream right away or freeze for at least 30 minutes to have a harder ice cream.


I'm participating in these parties!


Monday Meals


Wednesday, June 6, 2012

Deconstructed Eggplant Falafel

Please allow me to introduce you to the most amazing meal.


High protein.


High fiber.


Lots and lots and lots of healthy nutrients.


Gluten free, dairy free, and vegan.


Please rotate this Eggplant Falafel into your monthly meal rotation.  Wait, how about weekly... it's that good.


I first saw this recipe from Joanne at Eats Well With Others.  She is an amazing vegetarian cook and takes mouth watering photos.  I took her recipe for Falafel-Stuffed Eggplant with Tahini Sauce and Tomato Relish and put a few subtle twists on it.  Now it's in a gluten free and vegan form and much heartier since I didn't puree the "stuffing" like she did.  


This is a perfect recipe to serve for guests as well, a lot of the prep work can be done at an earlier time and the presentation is just beautiful.


Ingredients:
Tahini Sauce:


3 tbsp water
2 tbsp tahini (found at specialty food stores) (you could sub hummus if you'd like)
4 tsp lemon juice
1/2 tsp ground cumin
1 clove garlic, minced

Eggplant "Stuffing":


1 large eggplant
few pinches salt
1/4 chopped onion
2 portobello mushrooms diced
2 Tbsp parsley
1 tbsp tahini
2 tsp olive oil
1 1/2 tsp ground cumin
1/2 tsp ground coriander
1/4 tsp freshly ground black pepper
1/4 tsp cayenne pepper
3 cloves garlic, minced
1 can chickpeas crushed (I used a potato masher and went to town.  you want it to be chunky so it gives the meal a "heartier" feel.  usually the chickpeas are processed to a paste... but I am still waiting on a food processor!)

Relish:


1 cup chopped tomato 
1/2 finely chopped cucumber
1 Tbsp parsley
1 tbsp balsamic vinegar
1 tbsp olive oil
pinch of salt

Method:


1)  Preheat oven to 475 F.
2)  Prepare tahini by mixing water, tahini, lemon juice, cumin and garlic.
3)  Slice the eggplant in half lengthwise and cut sides with a crosshatch pattern.  Place cut side down on a parchment-lined baking sheet.  Bake for 7- 10 minutes until slightly tender and brown.
4)  Remove from the oven and carefully scoop out the pulp, leaving a 3/4-inch edge.  Place pulp in a medium sized bowl.
5)  Combine eggplant pulp with salt, onion, parsley, tahini, olive oil, cumin, coriander, black pepper, cayenne, garlic, mushrooms, and chickpeas in medium sized bowl.  
6)  Spoon the chickpea mixture into eggplant and bake for 25 minutes until the eggplant is tender and the chickpea mixture is lightly brown.
7)  To make the relish, combine the tomato, cucumber, parsley, balsamic, and olive oil.  (I was out of balsalmic vinegar so I mixed 1 Tbsp apple cider vinegar with 1/4 tsp sugar to substitute).
8)  To eggplants with relish and drizzle with tahini sauce. 


Enjoy this amazingly refreshing and healthy meal!


(major hubby approved FYI  ;)


AllergyFreeWednesdays


Ladybird Ln
Monday Meals