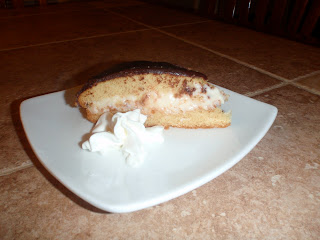
I learned from our first date over three years ago that food is the way to Beau’s heart! So for our anniversary I wanted to make a special treat: Tiramisu!
I looked up gluten free recipes online but didn’t quite want to go through the fuss of piping batter to make lady fingers. So I visited the best cooking website out there… allrecipes.com and decided to use the tiramisu recipe that had the highest rating. Lucky for me, the recipe suggested using white cake box mix as a base instead of lady fingers or a sponge cake.
 |
| I used 1 stick butter and 1 stick margarine which worked perfectly in the cake. |
For my cake I used the yellow cake mix in Elizabeth Barbone’s “Easy Gluten Free Baking.” This was the first time I used this recipe so I guess it was a bit of a daring move… but it turned out great! Even the batter tasted yummy, which is saying something for gluten free batters lol. In the second half of the batter I added instant coffee and a splash of amaretto since I didn’t have any coffee liquer. Next time I plan on adding more instant coffee to give it more of a kick!
 |
| My two favorite Sous Chefs!!! |
After the two 8-inch cakes cooled, I made the filling. Instead of making a traditional mascarpone cheese filling, I used other’s suggestion on allrecipes.com. I used two light cream cheese packages, 5 Tablespoons light sour cream, ½ cup heavy cream, and a few Tablespoons amaretto.
 |
| The cooled cakes...mmm...smelled wonderful! When you bake them, they colapse slightly while cooling, but don't worry, they're supposed to! |
I wasn’t quite sure about the flavor so I added in some powdered sugar to try to get rid of the cream cheesy flavor. When placed in between the cake layers, however, the cheese filling tasted great! It contains a lot less fat and calories (and costs less than marscarpone!) so I think it’s a great substitute. I think if one uses coffee liquer it will taste really super.
The next step in this recipe is the “frosting,” which is a lot more like stiff whipped cream. Heavy cream, powdered sugar, and amaretto make an amazing frosting to cover the entire cake. I could (and did) eat this stuff alone. SO YUMMY! And simple! Took about 3-4 minutes to get the perfect consistency. If you beat too long you risk making a buttery mixture.
At this point, Beau came home from work and I was so excited to show him what I was doing. And then all of a sudden, he shouted, “Oh my god, look at the door!” Ant-like nasty bugs were pouring out from underneath our back door. It was disgusting!!! So I left my baking creation unfinished and cleaned the inside of the house for the next hour or so while Beau went nuts spraying the outside of our house.
Turns out it was a termite surge, which is common in spring. Of course they decided to mate right in our backyard and spill into our super clean house. Ahhh, so no worries, they didn’t get any where near my tiramisu! The nasty little bugs died quite quickly after getting into the house anyways (and the bug guy said they are not harmful to people of animals).
Well good news to all those bakers out there… both the filling and frosting mixtures keep their consistency if left out in room temperature for over an hour lol! So if you get a bug infestation, they won’t melt!
Before I assembled the cake, I poked holes in the cakes (with my meat thermometer haha!) and poured coffee into them. I suggest soaking them a little more than I did and adding a coffee liquer to make a more dramatic flavor. Then I generously slathered on the filling, dusted some unsweetened cocoa powder, added the second cake, and covered the entire tiramisu in the frosting. Lastly, I dusted the cake in cocoa powder and shaved/ chopped semi-sweet chocolate.
I suggest letting the tiramisu sit for at least a few hours in the refrigerator before digging in. This cake was sooooo delish! Perfect for any occasion. And super easy to adapt to your own personal taste. Mmmm. I can’t wait to experiment with this recipe again!
Buon appetito!!!


